by Alycia Morales | Jun 8, 2021 | Book Review, Christian Books, Nonfiction Books, Reading
I decided to read Imagine Heaven by John Burke shortly after our 19-year-old son, Caleb, died in a car accident. I saw a book review on Facebook (although, I didn’t read the review). That was the first I’d heard of it. Then, people started recommending books to me, and Imagine Heaven was one of them. (NOTE: If you click through my links to amazon to purchase this wonderful book, you are clicking through my affiliate link. I will earn some pennies to fund my reading habits, but you will not be charged any extra for your purchase. Thank you! I love books!)
Imagine Heaven‘s subtitle reads: Near-death Experiences, God’s Promises, and the Exhilarating Future that Awaits You. And that is exactly what the book is about.
If you struggle to get through the first chapters of the book, I did too. Some of the experiences shared are valuable reading, but I really wanted to get to chapter four, where Mr. Burke gets into what Heaven is like.
John does a great job of basing the findings of these NDEs on a Scriptural foundation. In doing so, He reveals what God says in His Word about Heaven and how these people have experienced bits and pieces of it during their brief encounters with the Father, Jesus, angels, and loved ones who have gone before them. Each of these stories affirms God’s amazing love for us.
I would definitely recommend this book to anyone who is grieving the loss of a loved one. It provides a wonderful glimpse of what he or she is experiencing, provided they had a solid relationship with Jesus Christ and had accepted Him as their Lord and Savior. (See John 3:16-17, John 14, Matthew 25:1-13) Honestly, I can’t see how anyone could deny the Truth of God’s love for us and His eternal plan for us after reading the accounts of so many NDEs. I’ve always loved the descriptions of Heaven within the Scriptures. This book only magnified them more, and I continue to long for the day I get to experience the Father’s love on this level.
One of my favorite parts of Imagine Heaven is found on page 58, within the chapter titled “A Better Body.” Marv Bestemen, a retired bank president, was having surgery and is recalling a NDE he had after his family had left his hospital room for the night. “Standing in a short line of people, I observed the other thirty-five or so heavenly travelers, people of all nationalities. Some were dressed in what I thought were probably the native costumes of their lands…” On pages 68-69, in the same chapter, we get more from his story. “…he looked down and noticed he no longer wore his hospital gown; he was dressed in what he might normally wear to take his wife out…He later noticed that those he met in Heaven seemed to be dressed in what they felt most comfortable in on earth.”
If any of you knew my son, Caleb, you would have chuckled as I did while reading this. I can just picture my son standing before Jesus wearing his cowboy hat and boots, thumbs wrapped around a large belt buckle, shirt tucked in, smiling, with his guitar slung over his shoulder. He’s probably performing his newly written song for the Lord.

I must confess: Early in the reading of this book, I found myself asking God why Caleb couldn’t have been one to have a NDE and come back to life and a full recovery from his accident wounds. I wavered between jealousy that he is in Heaven with the Lord, experiencing all the wonders of eternity with Jesus and wishing desperately that he was still here with us. As I read farther into the book, I became more and more okay with the fact that Caleb remained with the Lord, rather than returning to us. Maybe it’s because it took me four months to read it, and with every passing day the pain of grief lessens little by little. Maybe it’s because I have come to terms with our temporary separation. Only God truly knows the deepest issues in our hearts and the answers we seek until eternity greets us. And I am okay with that too.
Purchase a copy of Imagine Heaven by John Burke by clicking here…

by Alycia Morales | May 15, 2021 | Discipleship, Faith, Faith Journaling, Health, Lifestyle, Mind, Planning, Self-care, Soul, Spirit, Testimony
In the winter of 2009, I had a minor midlife crisis. Overcome with anxiety, I spent a week wondering who I really was, what I really wanted to do with my life, and where I was in that journey.
What triggered my midlife crisis?
We’d moved for the second time in what would be an 8-move journey with my husband’s construction career. This time, we didn’t have the money to immediately set up internet services in our new home. Since I’d been blogging and running an Etsy shop for nearly a year, this lack of access to those sent me into a panic attack. Shortness of breath. Shaking. Irritable. The whole thing.
Shaken by the fact that I was having a panic attack, I immediately put myself into “figure it out” mode. What was causing it? Being a woman of deep faith in the Lord, I knew this midlife crisis wasn’t “normal.”
As I folded laundry one afternoon and cried (literally – ugly cried) out to God, I asked Him one question. “What do You want me to do for You?”
Here was my thought process:
I’ve been faithfully serving God for thirteen years. I’ve been serving my husband and working on our marriage for eleven years. I’ve been taking care of our children for that long, as well (I gained a stepson when we married.). And in the midst of it all, I’ve lost parts of myself. Parts I enjoyed. Dreams. Goals. Talents.
What did I do about it?
I told God I didn’t want to bury my talents or put them on a shelf in my home. I wanted to be that servant who took the talents her Master gave her and use them to gain more. More talents. Glory for Him. Donations for His kingdom on earth. Income for my family. I wanted to do something that was just for me at a personal level. Something that would bring me joy that wasn’t dependent upon the church, my husband, or my children. (I hope that makes sense.)
I wanted to commune with God on a personal, intimate level and use what He had given me to bring glory to Him.
Because when we have a testimony of His goodness to share with others, we glorify Him. And since He is the Creator, I wanted to create with Him.
This incident and a few others led me to looking deep within myself to discover who He created me to be and what He created me to do.

What was the answer?
His answer was “Write for Me.”
Which made perfect sense. As a youth, I always kept a journal, read avidly, and wrote a whole lot of what I called poetry. I loved writing papers, participating in yearbook committee, and sending letters to my friends and cousin. I had a few dreams of writing throughout my life: writing for glossy magazines for teens (like Bop, Teen Beat, YM, or Seventeen), an article published in Focus on the Family’s magazine. A novel.
It is a talent He gave me before I was born. It was in my DNA from the start. I am called to be a writer. To write for Him. To encourage and inspire others with my words.
Are you in a midlife crisis?
Maybe you’re in a mid-life crisis right now. Maybe you aren’t sure who you are or what you should be doing with yourself or your life. Maybe you’ve leaned on others to determine your worth or what you should do. I’m here to tell you that you can figure it out. It just takes a little soul searching.
First, who are you spiritually?
You already know that I am a Christian by faith. My identity comes from knowing who I am in Christ. If you aren’t a Christian by faith, where do you stand in faith? Are you a different religion? Do you serve a different god? Who does that god say you are? Are you only serving yourself? Does that work for you? Or does it feel like your life is in a downward spiral? Would you consider a different faith?
Once you identify where you stand on a spiritual level (because that determines not only what your belief says about you, it also determines how you handle life situations, how you treat others, and your place in eternity), you can move on to looking at other aspects of your life and who you are in the midst of them.

Second, who are you in this season of life?
I am a wife, mother of four biological children (one is out of the home already, one passed away in January of 2021, one is about to graduate high school, and one has a couple of years left with us), stepmom of one (he’s been gone for years), and foster/adoptive mom of one (she’s graduated and moved out of our home). I have two dogs and one cat that I care for. I run kids around all day. I write. I teach writing at a conference each year. I craft. I run my household. I’m busy in this season of life.
The first thing I recognized when I was conversing with God is that these things do not define me. They are a part of who I am, but they are not me as a whole. As a whole, I am a Jesus Girl. My relationship with Him drives everything else in my life. Affects everything else in my life.
What is the center of your life right now? In this season of life?
Third, what is your character like?
Character and personality are two different things. Personality is a surface presentation of yourself. Are you introverted or extroverted? Are you always bubbly or does a shadow hang over you? Are you funny or the last one to get the joke? Character is the core of who you are. It’s your moral standards. It’s how you treat others. It’s things like trustworthiness, loyalty, honesty, a desire to love others as you love yourself. Or, it can be the opposite. You could be truly evil at your core. You get the picture.
Is there a character trait you have that you wish you didn’t? Is it affecting your life in negative ways? Sometimes we have to deal with those in order to become who we know we’re called to be. And that’s okay.
Fourth, what gifts and talents do you have?
What are you really good at? What comes naturally to you?
For me, it’s encouraging and inspiring others. It’s writing. It’s creating via crafts, art, and photography. I’m a very visual person. It’s how I learn. I’m good at seeing the best in other people. In recognizing truth about people. I love helping others so they can be the person and do the things they want to be and do.
These are gifts and talents. Knowing what you’re really good at will help you figure out what you should be doing with your life.
Finding Joy
These are just a few of the things I questioned and resolved in my search for who I am and what God wanted me to be doing with my life in order to live abundantly, enjoy myself, and best relate with others.
Because when we have these things figured out, life gets a little easier. And a lot more enjoyable. The stress decreases. Energy increases. Depression dissipates. Joy takes its place. And the midlife crisis comes to an end.
What’s one thing you discovered about yourself today? We’d love to hear from you in the comments below!

by Alycia Morales | May 5, 2021 | Creativity, Planning
My favorite planner system is The Happy Planner from Me & My Big Ideas. The versatility it provides, as well as the variety of styles available are two of the reasons I favor it. In this post, I share how to get started with The Happy Planner.
How did I get started with my Happy Planner?
A friend of mine, Molly Jo Realy, gifted me with a Mini Happy Planner. I used it as a gratitude journal. It was the perfect size to write a daily entry about what God had done that day or what I was thankful for.
Shortly after, I bought my first planner.
I use my Happy Planners for several things. My “catch all” planner is where I keep track of my household’s busy schedule, which bills are due, upcoming events, and my wellness journey. My faith planner is where I take notes on Sundays and as I study God’s Word throughout the week. I have a planner for each of my book projects. One planner is where I keep my business plans, goals, and checklists. I have several Happy Notes (notebooks) where I journal, process my thoughts, and take notes when I’m learning online or at a conference. Finally, I use the Big planners for memory keeping.
Where can I find a Happy Planner?
Happy Planners can be found in multiple places. I get mine at the local craft stores, such as Joann’s, Michaels, and Hobby Lobby. I’ve also seen them at Walmart during the back-to-school season. You can also order them online directly through The Happy Planner website.
What should I start with?
I highly recommend starting with a Classic planner. One that will suit your scheduling needs.
 What size should I buy?
Size would depend on what you wish to do with it. If you are only keeping track of your schedule, a Mini Happy Planner may suffice. Do you have a child or two or multiples? Are you fostering? A chronic kid mom? If you have a smaller household size and fewer appointments, a Classic Happy Planner will work just fine. For those who have crazier schedules, a Big Happy Planner may be best for you. If you are homeschooling, then I recommend a Big Happy Planner.
Mini Happy Planners are about the size of a regular journal. Classic Happy Planners are about the size of a composition notebook. And Big Happy Planners are the size of a regular notebook.
Disc Love
Another thing that I love about Happy Planner is the expansion rings. If you want to add pages to a planner of any size, you can swap out the discs for a larger size. There are mini, classic, and expansion sized discs. The pages are super easy to pull out and put back in, as well.
There are so many options! How do I pick?
Getting started with the Happy Planner can be complicated with so many options to choose from. Especially if you’re one who gets easily overwhelmed by such a task. The question to ask yourself is: What is my style?
Happy Planner has something for everyone.
Do you like bright colors or muted colors or black and white?
Do you like flowers? Books? Animals? Rainbows? Art? Disney?
Do you like to garden? Are you a teacher? Do you faith journal?
Are you a farmhouse fanatic? Homebody? Fitness guru? Do you really want to take care of yourself this year?
There are planners for all of the above and then some.
What layouts do The Happy Planners come in?
Every planner has a year in review at the beginning of the planner and a monthly spread at the start of each month, prior to the weekly spreads.

Dashboard Layout
The Dashboard layout has a “dashboard” on the right page of the weekly spread where you can list things you need to buy, appointments or meetings for the week, take notes, etc. On the left side of the page are the days of the week with enough space to write things in. For my household, I love this planner.
The Vertical layout has three rows for each day of the week. The days of the week are laid out vertically across two pages. This is classic Happy Planner style. It’s the layout I’ve used most.
The Hourly layout is also vertical, but instead of having three boxed rows for each day, it’s lined for hourly scheduling. At the top of the column for each day, there’s room for your top three priorities for the day. Or stickers! The days of the week are spread vertically across two pages.
The Colorblock Layout is also a vertical layout, but it has 6 colorblocks in each row.
The Horizontal layout has the days of the week horizontally spread across two pages. The Minis tend to have this layout. The spaces are typically lined. And there’s one space each week for notes.
The Monthly Layout is perfect if you like to-do lists. In this layout, there are pages at the front of the month where you can set goals and make plans, take notes, etc. The following pages are lined in blocks so that you can write a daily checklist and check off items as you go through your day. There are also 2 pages for notes at the end of the month. I like to use this for my business planner.
For you teachers and homeschoolers, the Teacher layout has a planner-book-style layout where the days of the week go horizontally down the left side of the left page with lined columns in blocks across the rest of the left and all of the right page.
What about all these accessories?
Accessories are an individual thing. Do you like to keep things together? You may want to purchase a pack of folders. If you’re a sticker fanatic like I am, you’ve got plenty to choose from. Do you like sticky notes? They have them. I take a lot of notes, so I love buying their paper packs, which come in a variety of types and all the sizes. For those who love bullet journaling, they have dot grid paper. There is lined, blank, and grid paper as well. They also have plastic envelopes, which are handy for budgeting.
What I love about the accessories is that they are all themed with the planners.
The one accessory I recommend you buy with your planner is a dashboard. I know we talked about the dashboard layout above, but this dashboard is different. It’s a plastic, tabbed divider that you can use in your planner to mark where you are within your planner or divide your planner into sections. The tab will stick up from the top of your planner, not the side, where your monthly dividers are.
These are basic tips for getting started with The Happy Planner. For more information, please visit The Happy Planner’s Getting Started page, where you’ll find four short videos that explain the basics of Happy Planning.
For ideas on layouts and how to decorate your planner, you can find a multitude of pictures and videos on social media.
You can search the following hashtags on Instagram:
#mambihappyplanner
#thehappyplanner
#planahappylife
#mambi
#meandmybigideas

Or find my planner Instagram @alyplanslife and follow me for planner layouts and designs, tips, and more.
You can search the following on Pinterest:
Happy Planner
Happy Planner Ideas
Happy Planner Layout
Happy Planner Ideas Inspiration
Happy Planner Ideas Create 365
What’s one thing you look for in a planner? We’d love to hear from you in the comments below!

by Alycia Morales | May 5, 2021 | Business, Creativity, Planning, Writing
Everyone has their preference for how they keep track of all of life’s appointments, to-do lists, and hopefully the occasional date-night or girls’ night out. There are electronic calendars, wall calendars, desk calendars, pocket calendars, bullet journals, and planners available to all. I’ve tried several of these types of planners. But the one I keep coming back to and have stuck with for a couple of years now, is the Happy Planner.
The Happy Planner is a Me and My Big Ideas product. You can find it at most of your local craft stores, such as Michaels, Hobby Lobby, Joann’s, and even Walmart carries them. Or, you can go directly to the company’s website: https://www.thehappyplanner.com/
(See my post here about getting started with a Happy Planner.)
There are several reasons I love using The Happy Planner system for my planning purposes.
Here are the top eight:
1. There’s something for everyone.
Are you a stay-at-home-mom who works from home or homeschools? Chronic kid mom with a lot of appointments? Working mom who has to schedule everything around work hours? Someone who cares about health and fitness? A budgeting guru? A scrapbooker? Someone who loves to throw parties? A cook or someone who loves to bake?
With The Happy Planner, there are insert packs for all of these OR planners designed specifically for all of these. And the designs are fantastic, because they cover everything from the classy to the country to the colorful. Like I said, there’s something for everyone!
2. The interchangeability.
The Happy Planners come with discs, instead of a spiral or three-ring binder. I don’t know about you, but every three-ring binder I’ve ever had ends up falling apart. The clasps end up twisted and don’t close tight after a while. The papers rip at the hole, and then they fall out. Spiral notebooks warp and the paper gets stuck at the top or bottom of the spiral. That doesn’t happen with The Happy Planner discs.
The discs also provide room for interchangeability of pages, expansion, and mix-and-matching refills. Which leaves room for setting up your calendar system the way that works best for you.
And, the discs are interchangeable. You can mix and match between brights and metallics to your heart’s content.
3. The Pages and Refill Packs.
As I mentioned in reason one, there are refill packs galore. And as I mentioned in reason two, the pages are interchangeable.
I love that I can buy a planner that comes with the basic calendar pages (with a monthly review!) and then fill in whatever works best for me when it comes to extra pages. There are note packs. And you can get them in bullet journal style or lined. There are simple budgeting sheets, complete with a savings goal page. Holiday planning packs for all of us who love Christmas and baking cookies and buying presents and sending cards. Plus, there are fitness refills to track your health journey. I LOVE THE REFILL PACKS.
4. The calendar pages come in a variety of layouts.
One is goal oriented, and the page is structured with three priorities at the top of each day while the boxes are hour-increments through the day from 7 a.m. until 7 p.m.
Another style of layout is a three-box grid for each day of the week, and the boxes are empty. This leaves room for you to design it the way you like. The dated calendars have the date at the top of the pages, and there’s a monthly and weekly spreads for each month. The undated calendars are laid out like these as well, but they are undated. You can fill these in.
5. There are an abundance of Happy Planners out there in the world who share their spreads with others.
No matter what social media platform you have, you can find an abundance of layout ideas from other planners out there in the world. So you can be creative and use a Happy Planner, but you don’t have to be creative to do so.
And if you’re like me, you just love looking at (or ogling) all the Happy Planner spreads other people do! I have a Pinterest board for it, a saved posts category on Facebook for it, and a saved posts category on Instagram.
6.The Variety of Planners.
I have many things going on at one time. I’m raising my kids and doing family life. I am a journaler who loves to keep track of everything and takes notes when I study the Word of God or am at a conference. I work from home, try to budget, scrapbook, craft – do all sorts of things. The variety of planners I can buy keeps me content and able to do all of the things. Happy Notes. Memory Planner. Budgeting Planner. Fitness Planner. There are planners for my multi-faceted life, or I can buy one planner for most of it and just add pages.
7. The Variety of Sizes of Planners.
The Happy Planner comes in a variety of sizes. Three. Mini, Classic, and Big. Mini represents a journal-sized planner. Classic is more the size of a composition notebook, and Big is the size of a regular notebook.
 8. STICKERS!!!
I have loved stickers since I was a little girl. At first, I wasn’t thinking about it, but one day, in the midst of laying out one of my pages, it dawned on me. I love using The Happy Planner, because I love stickers! When I was in fourth grade, I spent several recesses trading stickers with a group of girls. I collected them. I love sticking stuff on the pages! And arranging them. And buying new ones.
These are reasons I love using The Happy Planner system.
Are you a Happy Planner? If not, what do you use? If so, what do you love about the system? We’d love to hear from you in the comments below!

by Alycia Morales | May 5, 2021 | Creativity, Home, Home Office
Organizing your craft room/home office doesn’t have to be rocket science, nor does it have to take a long time. I spent two days reorganizing mine and am so incredibly thrilled with my results. Join me in discovering how to organize your own craft room/home office so that your time spent creating is increased because of the efficiency of your organized space.
Please Note: This post contains affiliate links. If you click through any of them, I may earn a small chunk of change with which I may purchase more craft supplies or another rolling craft cart (that would probably take some saving up for). You would not be charged any extra for your order, should you decide to place one via my affiliate link.
When we first moved into our new home two years ago, I organized my craft office with what I had available to me, along with a couple of bookshelves I went out and purchased. I’d been following several #bookstagrammers and absolutely had to have those white shelves in my new creative space.

Fast forward two years, and I’ve run out of room to store everything. I’ve also developed an addiction to Happy Planners. And I’ve taken up mixed media art and Bible journaling, so my supplies have increased as I’ve tried new techniques.
My office was becoming unorganized and my storage space had begun to overflow onto surfaces meant for working and the floor.
When I learned that we were going to get our tax returns and our stimulus checks around the same time, I began planning to pull apart and organize my office in a way that benefited what I wanted to accomplish in my workflow. I have to have my space organized and clean in order to get any significant work done. Disheveled places are a huge distraction to me.
So, I decided I would buy myself two more of the same white bookcases to complete my wall of books. (Turns out, they were slightly different – a different brand, most likely. But they still worked.)
My first step was to remove everything from my bookcases and the dresser that held most of my craft supplies.
Here is what that looked like:

I moved the dresser out of my office. It will end up in my bedroom, as I’ve been living out of clothes baskets and a closet for the past two years. And since I bought the bookcases, I don’t have money for a dresser too. Priorities! LOL.
I assembled the bookcases and two craft carts. Then, I added the bookcases to my Wall of Books:

My next step to organize my crafting office was to put my books back on the bookcases …
…and figure out how I wanted to organize the one bookcase I am going to use for my crafting supplies.
I organize my books by author and genre or subject. I love the rainbow displays some bookstagrammers do with their shelves, but that would drive me crazy. I wouldn’t be able to find any of the books I was looking for if the series were all mixed up with other books. I am a bit OCD in these ways. So, I have all of Maggie Stiefvater’s books on a shelf with retellings of fairytales from authors like Marissa Meyer. I have Harry Potter with Hunger Games and Veronica Roth’s books. I have all of my dragon novels on one shelf and all of my children’s books on another. You get the picture.
Something you may wish to consider when buying books: Do you prefer hardcover or paperback? Do you care if you have a blend of each when it comes time to organize a series on your shelves? My sister is a die-hard hardcover book collector. She prefers them. And she doesn’t tolerate a blend of soft and hard covers when she is organizing her bookshelves. Me? I prefer hardcover for a favorite series, but I don’t mind soft cover. I do prefer consistency in a series, but if I end up with one or two of the opposite within the series? I won’t freak out.
Here are a few ways you could organize your books:
1. Put all of one author’s books on one shelf, if you have favorite authors whose books you buy as soon as they’re available for preorder.
2. Organize them alphabetically by the author’s last name. Or by their first name.
3. Organize them by color of the covers. Like a rainbow.
4. If you read multiple genres of fiction (YA, Romance, Suspense, Horror, etc.), organize them by genre. If you read nonfiction, organize them by topic (marriage, parenting, homeschooling resources, budget, etc.)
5. Turn all of your book spines to face the back of the bookshelf and guess which one you’re going to pull off. You’ll be surprised every time, but your entire case will be white! LOL.

The next step to organizing my bookcases was to add all of my decorations back in.
One of my favorite features of my office is the top of my bookcases. I love displaying all of my treasures for guests to see. (And I just love to sit back and look at them every now and then. They make me smile.)
I love to create bookstagram photos, so I have a growing collection of items to use in flat lays. Some items I collect are:
silk flowers – books – ornaments – books – jewelry – books – candles – books – mugs – books – masks – books – pens – books – typewriters – books – birds – books – bottles – books – hats – books – scarves – books – Pop figures – books – paper items – books – keys – books – pinecones

When I decorate and organize, I consider a variety of factors:
1. Color: Do these colors go together? Do they contrast each other well? Do I need a pop of a particular color here?
For example: The candle stand in the middle photo where the black pillar candle stands was empty. I needed a candle to fill that space. So I looked at the colors around it and, after trying a white candle I already had, decided black was the best color to go there.
2. Style: (country, steampunk, cottage, modern, etc.) I love farmhouse/country/cottage and steampunk. When done right, these styles of decorating can go really well together. You should see my kitchen. It’s a fun blend of steampunk (metals) and country (roosters).
3. Function: What function does the item in your hand serve? Decorative? Purpose? Put like functioning items with like functioning items. Then add a touch of the others.
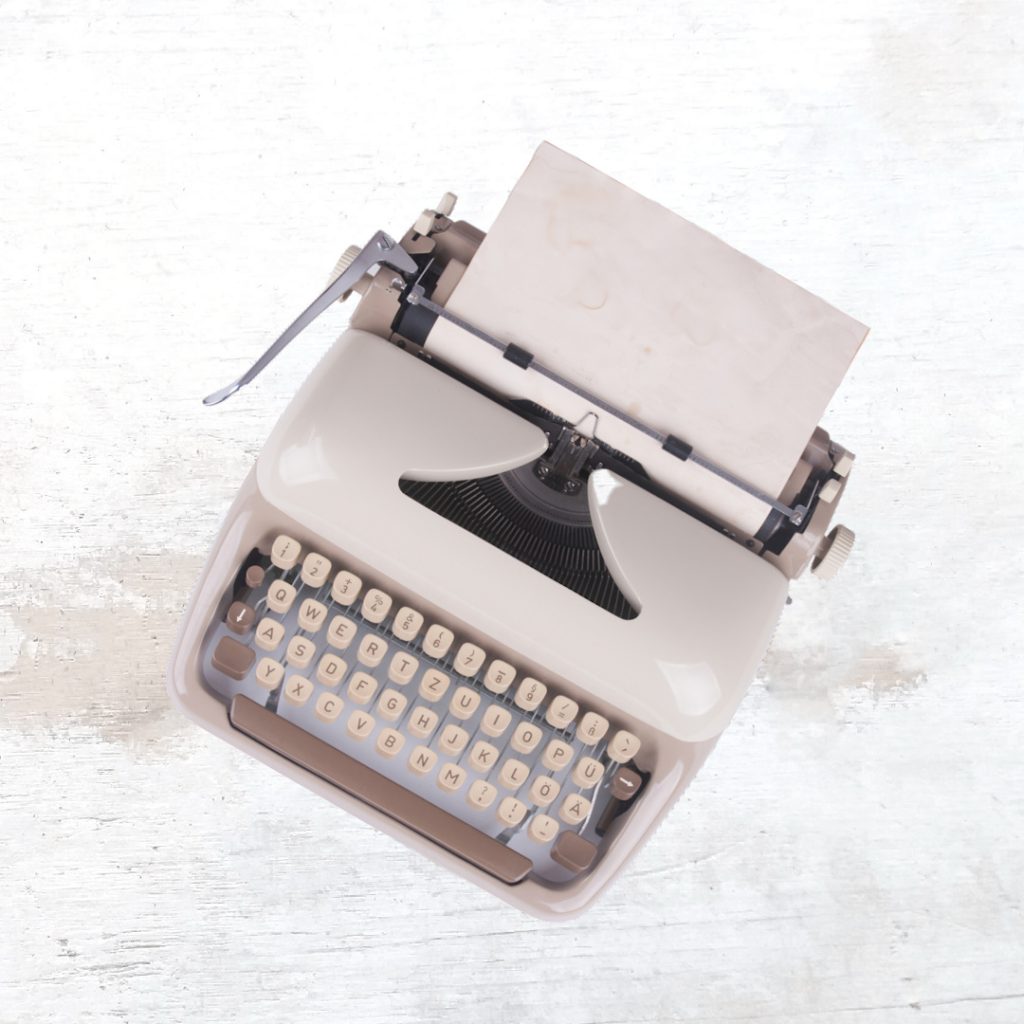
For example, you can see my typewriter (black case) on the shelf with my Twilight books in my book organization photos. That is the one of the three typewriters I own that functions well. Which means it’s the one I use when I’m creating things to sell. It’s mixed with my books, but it is available to easily pull from the shelf and place on my writing or crafting tables when I need it. As it is on the shelf, it’s decorative. When in use, it’s functional with a purpose.
4. Similarity: This is a key when organizing, but it can be decorative as well. Put like things with like things. That way, when you need something, it’s easy to find the one you’re looking for. This was an issue before my reorganization of my crafting office. I had too many things shoved too many places – and not together with their like kinds – because I was running out of room to store items.
When decorating, this works well too. Keep books together. If you want to use books in multiple places, stack books of like kind. Bottles look great clustered. So do candles. Like kind. Like style. Like function. It works!
5. Frequency of Use: This is important. If it’s an item you use often, keep it close at hand. Don’t bury it in a drawer or a closet. You won’t want to have to pull out a bunch of stuff in order to find that one pair of scissors you’re looking for. That’s a huge waste of time for something that has a simple fix: keep the scissors in a cup with other frequently used tools on your desk. Bury the punch you haven’t used in three years in the back of the closet.
6. Size: When organizing and decorating, understanding the size of something and how it fits into a space is important. These things matter when you’re assembling bookcases and rearranging your furniture. They also matter when you’re fitting many objects into one space. You want to be sure you have enough room for everything. If there isn’t enough room, you may need to add another furniture piece or basket or move some things around again until they all fit.
7. Texture: What are your favorite textures? I personally love metals, book covers, antique laces, linens, and soft, fuzzy blankets. I like oatmeal teddy bears. Ceramics. Leathers. These can all go well together. Are your favorite textures aesthetically pleasing when combined?
Pin It!

Now it’s time to go through all of those craft supplies and get them organized in a way that makes logical sense.

Ribbon and Mixed Media Element Storage:
I have a stand by my craft table that has three drawers. In these drawers from top to bottom (left to right in the photo above) are:
Top (Left Photo): Colored ribbons, floral twines, and sewing supplies. I use my needles and threads frequently, so these are immediately accessible.
Middle: Lacy ribbons and swatches of lace, embroidered cloths, and crocheted items.
Bottom (Right Photo): Paper flowers, feathers, and snowflake stickers/ephemera. These I use frequently in mixed media art, so they are immediately available as well.

Mixed Media Ephemera Storage:
I have a ton of mixed media elements floating around. Here, I organized several of those elements:
Left: This is a basket full of paper elements like tags, paper scraps, note cards, paint swatches, envelopes, etc.
Middle: This is an antique fishing tackle box (wooden) that holds my metal and other material ephemera. Think clips, game parts, metal ephemera from Tim Holtz… Basically anything that would look awesome on a steampunk art piece.
Right: This is my box (the butterfly box on my shelf) that holds all of the items I probably won’t use on a regular basis. See those plastic bottle caps? I planned to make a mixed media art piece out of them several years ago. I still haven’t gotten around to it, but I will one day!

Crafting Supplies Organization:
Here, I’m using the cloth bins that you can buy for cube shelf storage. Since my bookshelves are white and my craft carts are “mint” or “turquoise” (depending on how you color it), I bought “mint” cubes for my bookshelves. My cube spaces have four slots, so I bought four bins to fit into four out of sixteen slots. I didn’t need more than that, and I like using the slots as shelves.
Left: This is all of my mixed media mediums that aren’t paint or colored pencils or markers or pens. So, it’s full of gelatos, distressing mediums, ModPodge, gesso, and other such items. Note: The E6000 (jewelry/craft glue) has been moved to the middle bin.
Middle: This bin is full of my adhesives: tape runners, glue dots, glues, glue guns, etc. It’s all in one place, so I only have to grab one bin when I need an adhesive, instead of the three different places I had these items before.
Right: Stamps. Stamp Pads. Stamp cleaners. Embossing supplies.
The fourth bin, not pictured here, contains all of my plastic baggies, cloth bags, boxes, and tags for jewelry packaging.

Organizing Scrapbooking Supplies:
Prior to this setup, I had the dresser you saw in previous pictures stuffed full of scrapbooking supplies and stamping supplies and mixed media supplies. The wide, bottom drawer of that dresser felt like it was going to snap off and fall to the ground every time I opened it. I was tired of having to hunt for the papers I wanted to work with and sort through a basket full of stickers (that now holds my mixed media paper ephemera, as mentioned above). This works SO MUCH better!
Left: My cardstock, my Memory Keeper Happy Planners for 2019 and 2020, and a bin with three drawers that now contains my sorted stickers. Drawer One contains stickers for particular projects (like kids’ albums). Drawer Two contains all of my “pretty” stickers (flowers, birds, butterflies, steampunk, Illustrated Faith, etc.). Drawer Three contains fall and winter and Christmas stickers. Note: I still have a binder filled with page protector sleeves full of organized by subject stickers under my craft table. These are already designated for different scrapbook albums, so I have them separated.
Center: The butterfly box. That’s full of all that ephemera I don’t use often. But the box above it is filled with scrapbook paper that is precut to back pictures and journaling boxes. I’m still in need of purchasing another photo box to store the card envelopes and pre-folded cards I have for my card making activities.
Right: Here, you can see that I’ve stood new scrapbooks to the right of the bins that now hold my organized scrapbook papers (It took six of them!).
TIP: It’s important to recognize that you will need to organize your supplies THEN put them back on your shelves or into drawers.
Now, my craft bookshelf is complete:

Organize Happy Planner Supplies On a Craft Cart:
I am a Happy Planner addict (I think I said that before.). I love using their planners! (👈🏻 Click to find out why.) It took me a lot longer than others, but I finally bought a craft cart (this links to the exact one I have) to store my planner supplies on. Now, instead of hauling a basket of stickers, a basket of washi tape, a pack of markers, refill paper packs, discs, and a host of other things – PLUS my stack of planners – all over my house, I can easily roll this cart wherever I want to plan that day. What a life saver! (And back saver!)


Top Shelf: Here are my sticker books that I most frequently use, my beloved washi tape, new markers, and a coffee cup with my tools (scissors, more pens, etc.) in it.
Middle Shelf: Here are my planners for next year (yes, I bought ahead!), the stickers I once pulled out of my sticker books to organize them better and decided I hated that method of organization, and refill packs of pages, dashboards, and old dividers that I will recycle.
Bottom Shelf: Currently used Happy Planners, a basket of discs, and my HP punches. The empty container has been removed since this photo was taken. It’s now in my bedroom waiting for a new purpose.
If I didn’t have the cart, these would all be on a bookcase, just like my other supplies. Or in a pile in the middle of my bedroom floor. LOL.
Organize Paint Supplies On a Craft Cart:
I use acrylics and watercolors more than any other paints. So that is what I will demonstrate my organizational preferences with.
First, I needed a drip catcher for my cart. I am storing my blank or prepped canvases on the bottom shelf of my cart. I don’t want paint or cleaners or mediums to drip onto those. So here’s what I did:

First, I purchased a cheap plastic placemat. I got mine at Walmart. It cost $1.98 or so.
Then, I cut the placemat down to fit snuggly onto the middle shelf of my cart and inserted it there.
Now, if anything drips, I can quickly clean it off the mat and won’t have to worry (too much) about the canvases below.
Let’s talk about how to organize and track the paints:

First, let’s talk about organizing paints. In my cart, you can see my paints. These are all acrylics.
I have organized them in rows according to colors.
Top to Bottom: Whites – Grays – Blacks – Browns – Yellows – Oranges – Reds – Pinks – Greens – Turquoises – Blues – Purples – Metallics
If a paint bottle is flipped upside down, it’s halfway or more empty. I will need to replace it, unless the exact same color is upright next to it. Then, I know that I need to use the almost-empty paint bottle before opening the new one.
Next, let’s talk about tracking paint supplies. I’ve given you a couple of pictures of the notebook method I decided to use while I was cleaning and organizing the office.
- I designated a page in the small notebook (so it easily fits in my purse and isn’t bulky to carry) to each color of the rainbow and a few more, plus metallics.
- I gave myself two columns to the side. “H” stands for “Have.” “N” stands for “Need.”
- Then I wrote down every brand and color of paint I have in those colors. The brands are labeled with initials. Then the colors are written in next to the brand.
- A check under “H” means I have that color and don’t need any.
- If I have a small tally mark in the “N” column, then I know I need that paint color because my supply is low.
- Once I purchase the color, I will hash across the tally mark to show I’ve resupplied the color needed.
- The next time I need the color, I will put a new tally mark in the “N” column.
Here is my paint supply cart:

Top Shelf: Acrylic Paints
Middle Shelf: Paint Brushes, Cups for water when painting, Pallets, Paint Mediums, Cleaners, Stencils, and other paint supplies.
Bottom Shelf: New and prepped canvases.
You will note the larger canvases leaning between my craft table and a cart behind and right of the paint supply cart. Under the table is a basket with more canvases in it. That is most of my paint supplies. I use the canvases mostly for mixed media artwork.
The Final Results of My Efforts to Organize My Craft Room/Home Office
Now that most of my supplies had been organized, I went through the remaining piles of papers on my desk, putting things in their proper places, until I didn’t have a single pile left in my office. Here is the final result:

Left: Writing Desk/Writing Books/Happy Planner Craft Cart
Middle: Front Windows/Totes with Artwork and Files to Go Through/Journaling Shelf with Bookstagram Flat Lay Materials
Right: Craft Table and Paint Cart (All of my jewelry-making supplies are stored under this table.)
And, last but definitely not least, I give you The Book Wall:

No matter your preferred craft or creative bent, organizing your craft room or home office space should not be an issue.
It doesn’t have to be. No matter how disorganized you may think you are, there are things you can do to make yourself a space where you can go to create without frustration.
Here are my tips for organizing that space:
1. Know how much space you really need.
- If you find that your room is beginning to look like an episode of Hoarders, it’s time to clean out. Begin to go through your supplies. Just as you would your clothing closet, ask yourself, “Have I used this in the past year?” If the answer is no, and you do not have a definitive plan for it (like I do my bottle caps), do one of four things: give it to a friend, throw it in the trash, thrift store it, or sell it.
- If you have too much stuff but not enough space (but you’re definitely not hoarding your favorite things), use what you have until you have created enough space to store more. Then go shopping again.
- If you have a need for more space, find some. Use a bigger room in your house (Could you trade your bedroom for your craft room?). Rent a space (Where I’m from, they’re turning a lot of old mills into art studios.).
- If you have a large space with fewer supplies stored in it, be aware of how much room you have to grow.
2. Everything has its place.
- When you’re tempted to be lazy and just toss that pad of scrapbook paper you just purchased on the craft table, don’t. Put it away.
- When you’re finished creating for the day, clean your tools and put everything away.
- When you buy something new and aren’t sure where to store it, figure that out on your way home and put it wherever you decided when you arrive.
- Make sure everything has a shelf or bin or drawer or closet to go into. Don’t let little piles of stuff grow around the room.
3. Do what works for you.
- Are you better with bins than shelves? Do that.
- Are you better organizing with color codes than words? Do that.
- Are you so disorganized you can’t even move? Get help. Do that.
- Are you better at keeping track of your supplies on your phone (digitally) than on paper? Do that.
We are all created with a unique set of creative gifts, talents, and personalities. Some of us are better at English than at math. Some are better at tech stuff than painting. Some of us are better at writing than gardening. You have to do what works for you. And if something isn’t working for you when you expect it should, ask yourself why. Are you getting in your own way? Are you afraid of something? If so, get out of your own way and get back to organizing. If not, try a different method. Try a different style. I could be something as simple as not really liking a color choice or pattern or texture. Which leads to my next point:
4. Switch it up.
Don’t be afraid to change things when they don’t work for you. Or when you get tired of seeing the same two colors every day. Or when the layout of one shelf keeps grabbing your focus when you’re trying to create. Change can be a really good thing. Be open to it.
5. Make it yours.
Not everyone likes simplicity. Not everyone likes murals painted on the walls. You have a style of your own. You know what it is. Or at least you’re torn between two or three styles. Play around. This is your creative space where you will create things. Be creative with the space itself. I love steampunk designs. I also love the antiques and warm feels of farmhouses. The two actually blend well. But I wouldn’t have known that if I hadn’t played with my decor.
Be sure to add personal touches too. Your artwork. Photography. Music. Crocheted blanket. Put your personal touches to work in your office decor.
It’s important for you to have a space where you can get away from the everyday routines of life and create something glorious. I hope this article has helped you to create that space and organize it in a way that makes creating things more efficient for you, saving you time so that you have more of it to craft or do business with.
If you have any questions about organizing or creating a space that suits you and your needs, please feel free to leave a comment below. I’d be happy to respond!

by Alycia Morales | Jan 13, 2020 | Self-care
We’re through the first week of 2020, but are we still ready to take on the world? Did we make a resolution that we’ve already failed at keeping? Do we wish we had the stamina to focus and make those desires in our heart a reality as busyness ensues?
 Making a resolution is one thing. Keeping it is another.
Instead of making resolutions, I choose one word for the year. It’s a word I will focus on. I will seek to know what meaning it has in my life over the next twelve months. It’s a word I will question God about, expecting Him to answer. It’s a life-changing or challenging word. Or maybe it’s a word of rest and peace. This year, my word is INTENTIONAL
Others choose a Scripture or a mantra to live by for the year.
Are you unsure if you want to make resolutions and try to keep them or choose one word to focus on or maybe do something else entirely? Maybe you want to just avoid all of that and carry on. That’s okay too.
Whatever you choose, I’ve created this list of 20 questions for you to ponder in 2020.
The intent is that they would be eye-opening for you. Reveal something you may not have known about yourself. Pull something you knew from the recesses of your mind into the open for you to seriously consider. Spark a new hope for life going forward. Remind you of a long-lost dream.
The following are some ways to handle the questions:
- Answer one of them per day for the next 20 days and be done.
- Pick two to focus on each month from now through October and write down everything you learn as you answer them. Take November to be thankful for everything you’ve learned and December to recap the year as you’ve journeyed through these questions.
- Ask yourself each question each month this year and see how your answers change over the course of 2020.
- Every other week, write the next question in your journal and spend the next two weeks documenting whatever comes to mind about the questions. These could be things to consider, one word, a quote, a Scripture, free writing, doodling, cutting and pasting from magazines, etc.
However you approach them, I pray you’ll find encouragement, hope, improvement, joy, success, and abundant life as you go through them.

20 Life-Changing Questions to Ask Yourself in 2020
1. Am I who I wanted to be by now? Why or why not?
2. Am I doing what I wanted to do by now? Why or why not?
3. How is my spiritual health?
4. How is my physical health?
5. How is my mental/emotional health?
6. What’s one thing I’d like to change internally (about myself) this year?
7. What steps do I need to take in order to make that change happen?
8. What’s my WHY?
9. What have I wanted to do forever but never done?
10. What do I enjoy doing? What are my passions?
11. What would I do if I had the resources/knowledge/time to do it?
12. What is one step I can take today to making my dream a reality?
13. What excuses am I using instead of making things happen?
14. Do I want to be made well or do I want to continue being a victim or stuck in my uncomfortable comfort zone for yet another year?
15. How are my relationships? Seriously.
16. Who would I like to improve my relationship with the most?
17. What’s one thing I can work on to improve that relationship?
18. Do I isolate myself from others? If so, why do I do this?
19. When is the last time I did something I enjoyed just to relax and enjoy it? Why has it been so long?
20. Where would I like to go on vacation, and how can I change my budget to make that happen?

What have you chosen to focus on in 2020? We’d love to hear from you in the comments below!

by Alycia Morales | Jan 7, 2020 | Discipleship, Faith, Lifestyle, Self-care
Every January, I ask God to give me One Word that He would like me to work on throughout the upcoming year. I’ve been doing this for nearly a decade now. Here’s a look at my words from past years:
2009: HOPE
2010: (I can’t find my word.)
2011: PROSPERITY
2012: REPRODUCTION and MULTIPLICATION (It’s okay to have two words or a phrase.)
2013: EVERYTHING
2014: GOODNESS
2015: FULLNESS
2016: RELATIONSHIP
2017: OBEDIENCE
2018: REMEMBER
2019: JOY
That’s a lot of words! And God is faithful each time to lead me through the year, focusing on the word, while relating with Him. (more…)